News
Tips and Tricks – Long Exposure Drone Photography

Sep
If you have seen my work or read some of my previous posts, you already know how much I enjoy low light long exposure photography. It requires a certain amount of planning and preparation, and when shot correctly, leaves a ton of room for creativity in the post-production process. Late evening seascapes as well as night photography require the same skill set and are by far my favorite time to go out and shoot.
Let’s Try Something New
Over the last several years, this was all performed with my Canon and a tripod. There was really no other way to accomplish crisp images with an open shutter. That is until I got a DJI Phantom. I vividly remember going through the DJI camera controls and laughing when I saw an eight second exposure setting. Eight seconds! How on earth is a little drone going to hold the camera still for eight seconds, at altitude, in wind, with four propellers working to hover in place? This made no sense to me, so I knew I had to give it a try.
Let me start out by saying that a successful long exposure aerial photograph requires some proficiency in Photoshop. A familiarity with image stacking and layer masks is crucial for the final product. Hopefully I can explain it in a way that, should you choose not to learn the techniques in Photoshop, you can at least see the process and understand these images a little better.
It Starts with a Plan
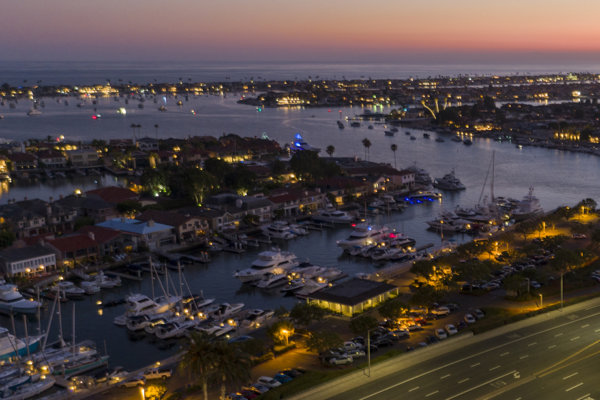
As is the case with any photograph, an interesting subject matter and composition are the building blocks necessary for success. My go to subject matter in most of my long exposure seascapes are piers and unique rock formations. I like to capture the motion in the water, and I have found that super wide-angle lenses allow me to get right next to whatever it is I am shooting. Obviously, with a drone, I am going to be above and a decent distance away from the subject matter. My field of view is much larger, so I need to find something to shoot that isn’t quite as detailed as water motion.
So, I need something that is moving. I need low light to allow for a properly exposed eight second image. And I need something that is interesting and appealing to the eye. Light trails seem like a great place to start.
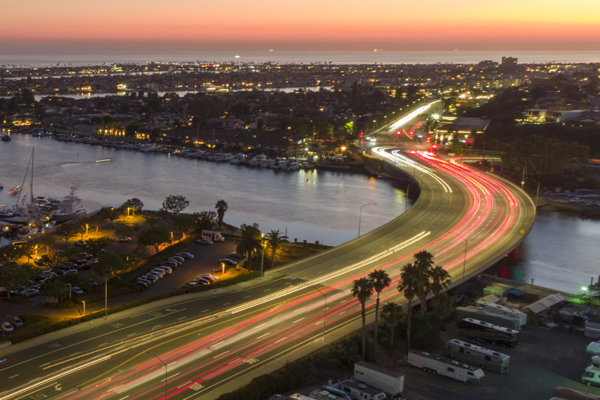
Light trail photography is accomplished by simply shooting a long exposure photograph while a light source passes in front of the open shutter. Think of the light source as a paintbrush that passes over the sensor while it is taking the image. A very common source of light trails is moving cars. The combination of front lights and taillights streaking across one image results in colorful and dynamic night images.
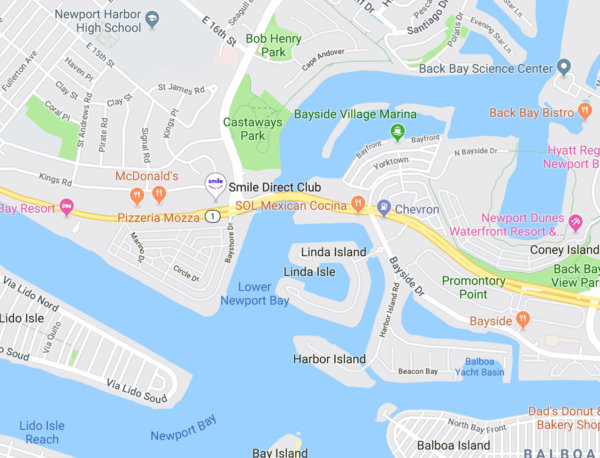
With the drone I’m able to easily get up above the cars so now it’s a matter of finding an interesting place with a bunch of moving lights. Like I said before, bridges and piers are great so let’s find a bridge or an interesting bend in the road to add to the composition. So now I know I’m going to go shoot some light trails on a bridge with a bend. I happen to know where to find that exact composition.
Time to Shoot
This is where things get a little complicated. We have our subject and we know what we want to accomplish. Time to get the drone up and start shooting the multiple images necessary for our final product. Let’s go back to how steady a drone can keep a camera for eight seconds. While it is incredibly steady, it isn’t perfect. You get some great light trails but the surrounding structures such as the bridge and the buildings are not going to be very sharp. It just isn’t possible for the camera to have no shake under the circumstances.
Because of the slight shake in the camera platform, it is necessary to take some faster exposures for everything in the image except the light trails. The best way to accomplish this, in a low light situation such as a sunset, is to increase the camera’s ISO and open the aperture as much as possible. When it comes to creating the sharpest image possible, the largest aperture isn’t necessarily the best way to shoot, so I trade off with trying higher ISO and smaller apertures for these first few shots. The key to this first step is to take multiple images that are properly exposed while switching apertures and ISO. The goal is a sharp image with low noise. We can adjust in post-processing, but a strong source image is where we always want to start.
What is Super-Resolution?
Let me take this opportunity to talk about a great photoshop technique to improve this part of the process. It is called super-resolution and it is a stacking technique that takes several images and stacks them into one sharp image. The difference between super-resolution and focus stacking is that with focus stacking we are trying to generate a larger depth of field. With super-resolution we are trying to eliminate noise by using the minute sensor shifts between each image. Because the drone is slightly moving, we get minute sensor shifts in between shots and can stack and create an image with more pixels. This results in sharper low light images with less noise.
The Main Event
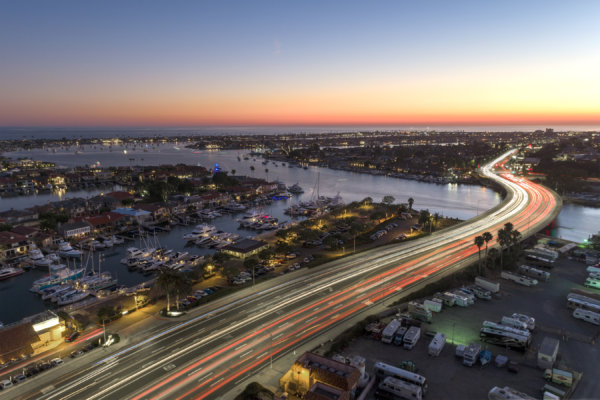
Ok let’s get back to shooting some light trails. Now that we have our structures and bridge shot with many combinations of noise and sharpness, we can confidently move on to the light trails. The drone is still hovering in our originally composed frame and it is time to lengthen the shutter speed to eight seconds. The nice thing is we are no longer worried about sharp images. Light trails are moving cars so any wobble in the camera will go unnoticed. We can lower our ISO to 100 to reduce noise as much as possible and all we need to do is make sure we are using the proper aperture to get a perfectly exposed eight second photograph.
For this part of the shooting process I usually suggest using shutter speed priority. Pick eight seconds at ISO 100 and let the camera software do the rest. I usually shoot between eight and ten images at this stage. You need to be conscience of the cars as well. No need to shoot when everyone is waiting at a red light. If you know you have a few exposures of the cars coming your way and few of the cars going away, you are done. It’s time to go home and build the final product.
Putting It All Together
My first step is always creating the sharp image first. I totally ignore the light trail images until the base image is complete. Depending on the quality of these images, I might just pick one or I might need to go with a super-resolution stack of images. It’s up to you. Sometimes I just like to practice with super-resolution for the times when I don’t have a choice.
The next step is creating the light trail image. Much like creating a super-resolution image, I find the best four or five images with light trails. My goal is to get the whole bridge covered simultaneously. I take these images, align them and then stack them in Photoshop. I set the stack mode to maximum, this gives me the brightest parts of all the images and creates one image with all the light trails combined. We now have two separate images that we are ready to combine.
Next, we take our stacked light trail image and copy and paste it over our sharp base image. After auto aligning these images, I add a layer mask and combine the two images so the light trails can now be seen within the sharp image. From here I merge the two layers and finish up with any level adjustments, spot-healing, and final color correction. I commonly add a high pass filter at this stage in my photographs, but that sometimes has the effect of adding noise, which is something we worked so hard to avoid in the first place. Time to save the image and admire your work.
That’s a Wrap
If you’re exhausted at this point, I totally understand. Photoshop is an incredibly robust program and applying these techniques successfully takes some experience. YouTube is an incredible resource for step by step instructions on everything I have previously mentioned. My goal, rather than teaching the techniques, was to give you an idea of how they are applied to create these dynamic images.
Please let me know if you have any questions regarding aerial photography and long exposure techniques from a flying platform. Fly safe and give this a try. You never know what you might learn.
This is exactly what I was looking for, even though I didn’t really know how involved the procedure was. Thanks a lot! The only thing is Mini 2 only does 4s. Hopefully it will be enough…
Hi Aleksandar. Glad I could help. 4s should be enough to get some trails. Only thing I would suggest is stacking more images. That will get you the desired effect. Hope it works out and have fun experimenting!