One of the great things about photography is that, with a little bit of effort, it can be done anywhere at any time. The only thing that matters is the photographer’s willingness to adapt and learn from their environment. By learning from what our immediate environment offers, we can take these skills and successfully apply them when given the opportunity to shoot in an unfamiliar location.
As a photographer who grew up on the beach, my focus has been late afternoon seascapes. To be successful, these photographs require the proper equipment, planning, and weather. I am working in an environment that is constantly changing. Whether it is the crashing waves or the setting sun, the subject matter is in constant motion. The result is that I’m familiar with shooting in low light situations. Skills that transfer well into one of my favorite genres of all.
Night Photography
Some of my favorite images are of the Milky Way or a mountain landscape lit only by the moon. Unfortunately, this type of night photography presents several challenges. Much like seascape photography, even the most meticulously planned locations can be ruined by a change in the weather. A cloudy sky or a windy night come to mind when I look back on the issues I have had. The window of opportunity is extremely small.
Because of these challenges, I have found that my most successful nights of photography take place in cities, and not under the bright stars of the milky way. The city lights offer an unending supply of subject matter and the ability to avoid the sky completely if necessary. Best of all, if I miss the shot, I usually get another opportunity the following night.
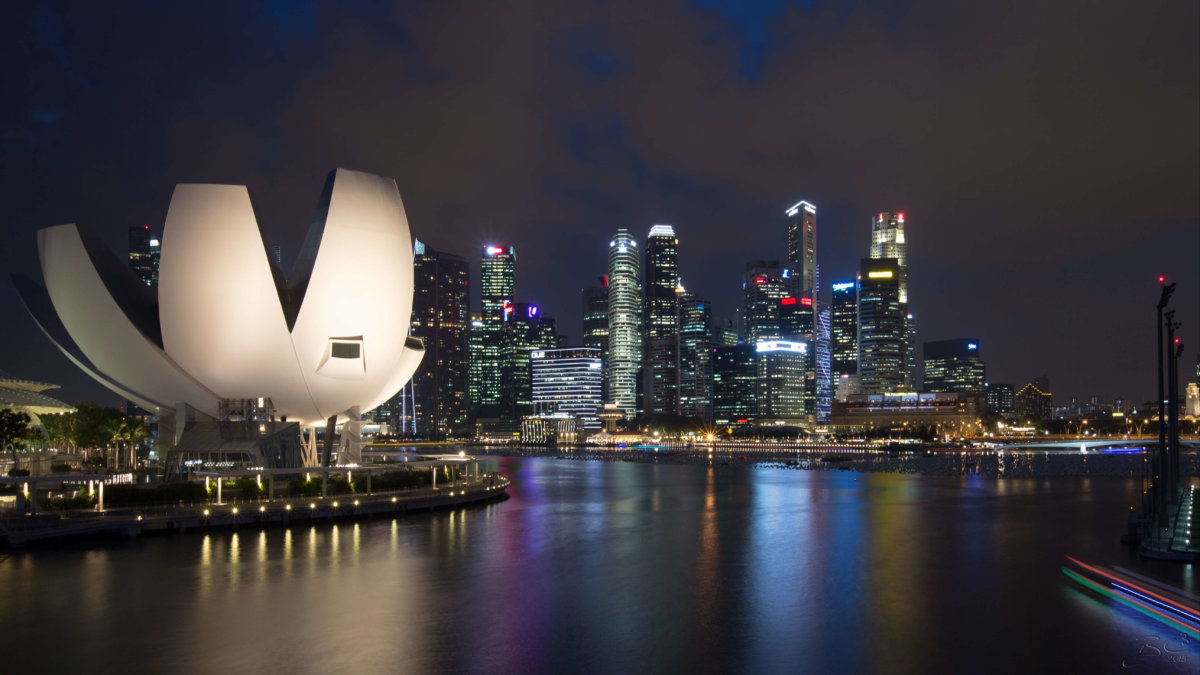
Singapore
There are few places friendlier to night photography than Singapore. It’s always warm at night, the streets are extremely safe, and the whole marina and downtown are lit up like an amusement park. When my wife and I planned to stop in Singapore for a few nights, I knew it was time to apply everything I had learned at home.
The Marina Bay Sands stands in the background overlooking the Singapore Marina
The Basics
I shoot with a Canon 5D Mark iii, but any good DSLR will do. As long as you have a camera that allows you to shoot manually and a sturdy tripod, you will be fine. Night photography requires long exposures so a tripod is a must. There are ways to succeed without one, but the sharpest images are generally going to be shot on a tripod. Many photographers use a remote shutter release. While not essential, they help reduce vibration and can help you get the sharpest image. Other than that, I use a haze filter on my lens and that’s it. If you have this equipment you are ready to go.
An unbelievable view from our hotel balcony
The Tricks
One of the most difficult aspects of night photography is getting the image in focus. Because of the lack of light, the camera’s autofocus mechanism has a very difficult time locking in on your target. There are several ways to overcome this obstacle and with a little preparation you can get extremely sharp images without relying on the camera’s autofocus.
The best way to guarantee a sharp shot is to scout the location during the day. Decide on your composition and focus the camera on what you plan to shoot. Now that your lens is focused, turn off autofocus on your lens. Now when you return later that night you know your subject will be in focus. This technique has some obvious drawbacks. First, once focused, that lens is basically off limits for the remainder of the day. Not ideal when travelling and shooting. Second, the shot planned during the day might not be available when you return that night thus negating the prior focus.
Because of the previous technique’s drawbacks, I most often default to the following focusing method. I carry a bright flashlight with me every time I go out for a night shot. This allows me to set up my shot and then use the light to illuminate an object that the camera’s autofocus can find. Once the focus is set, I once again turn off autofocus and the image stays sharp.
Gardens by the Bay taken from the base of the Singapore Flyer
One final trick is to use live view to fine tune the focus. This is a trick I use for all my low light images. With live view activated, I zoom in 10x on the subject, and then manually focus for the sharpest image possible.
Over the years, I have used all of these focusing methods with some degree of success. My sharpest images are often products of all three.
I can’t tell you how many times I have gone on a night photography mission only to come home empty handed. Photography is the art of capturing light, and when there is very little light, photography can be difficult. With a little planning and by following the focus techniques I have mentioned; your images will be sharp and your endeavor that much more satisfying.
Last but not least, go out and shoot!
1 thoughts on “Tips and Tricks – Night Photography”
Anthony says:
Wow! Singapore has some amazing photo opportunities and you’ve managed to capture them so well! Thanks for these tips and keep them coming!


Wow! Singapore has some amazing photo opportunities and you’ve managed to capture them so well! Thanks for these tips and keep them coming!