Long exposure photography has always been my favorite style of photography. I remember taking my Canon A2E out at night and trying to capture light trails of cars on the highway or planes overhead. The added sense of motion made my amateur photographs look more interesting and I loved that I could finally doing something more than take snapshots. Eventually I learned about neutral density filters and discovered that I didn’t need the absence of light to leave the shutter open for long periods of time. I finally understood why waterfalls and rivers looked like they were flowing or clouds looked they were blowing across the sky. From there it was only a matter of using my imagination. Naturally, this led to the beach and it was off to the races from there.
If there is one thing I wish I knew when I started, it would be how to properly plan before going out to take photographs. When I first started, I knew I wanted to be at the beach when the sun was setting or rising. I had a basic understanding that the golden hours generally have the best light and, obviously, the clouds start to change color. Unfortunately, there were a number of environmental variables that I didn’t think about before heading to the beach. Over the years, I eventually developed a process that helped improve my chances of success. Whether that success is actually getting a great photo, or just making it home dry, the following tips should help you help out. Let’s take a minute to run through the basics of long exposure photography before diving into the planning process.
The basics
As I discussed in my night photography article, there are a few pieces of equipment that are essential to a successful long exposure photograph. I shoot with a Canon 5D Mark iii, but any good DSLR will do. As long as you have a camera that allows you to shoot manually and a sturdy tripod, you will be fine. Many photographers use a remote shutter release. While not essential, they help reduce vibration and can help you get the sharpest image.
Along with a sturdy tripod, a neutral density filter is a must. My go to filter is a three stop filter, commonly known as a ND8. Essentially, this is the same thing as putting sunglasses on your lens. It does not degrade the image, and it tells your camera sensor the f/stop is three stops down from where it is actually set. The result is the sensor needs more light. We can now slow down the shutter which causes motion blur for whatever is moving in the frame. Since we are on a tripod, if part of the frame isn’t moving it stays sharp in the frame. There are a number of different ND filters and you may find you prefer a darker or lighter variation depending on the objective.
Planning
First and foremost, we need to decide when we want to shoot. Let’s start with the golden hour. This is undoubtedly a great time to take pictures, however it is before the sun sets. This is important for a couple of reasons. If you plan on shooting into the sun, it may take more than a simple filter. The bracketing has to be extremely wide in order to get the foreground, middle ground, and background in an even exposure. This can easily be overcome in post-production, but it is something that needs to be considered when shooting at this time of day. Another thing about the golden hour, is that the clouds have barely started to change colors. So, if you plan on pretty pink or purple skies, this is not the time to shoot.
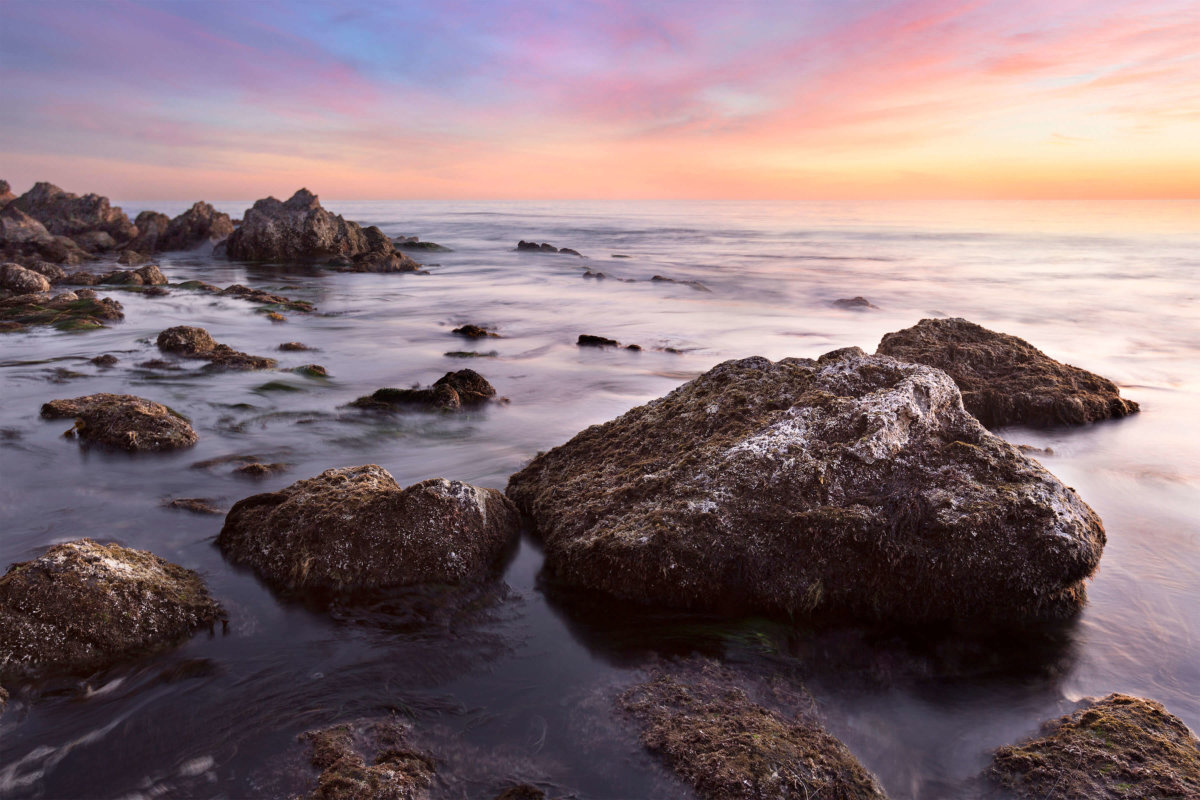
This brings us to the blue hour. This is the hour that occurs after the sun sets. This is my favorite time to shoot. I love this time of day for several reasons. First of all, people leave the beach after the sun sets. Most people think it is over when I know it is only beginning. The shadows start to soften now that there isn’t direct light from the sun and the clouds light up with vibrant colors. The reflections off of the water and the rocks also soften and the whole scene takes on an ethereal glow. I cannot tell you how many times I left the beach thinking the sunset was a bust only to look back twenty minutes later to see I was missing the entire show. I still find myself packing up early, knowing that my style is defined by the blue hour.
Now that we have established the best times to shoot, we can start to focus on the environmental factors that must be considered when taking photographs at the beach.
Surf
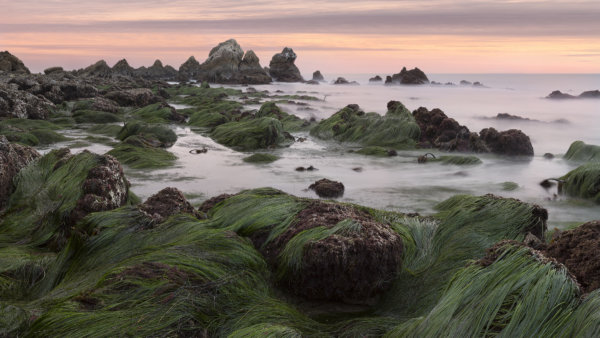
I always check the surf report before heading down to the beach. If the waves are big, certain beaches are immediately out of the question. There are going to be too many people at some beaches and rocky shorelines are too dangerous to visit. Besides safety, the surf report is great for another reason. It determines my subject matter. When the surf is small, I usually shoot reflections. The small waves allow me to get low and close to the rocks without the risk of getting soaked and damaging my gear. When the surf is big, I usually try to take long exposures that make the surf look like fog. These aren’t hard and fast rules, but it definitely helps in the overall planning process.
Low tide on the reef guaranteed that there would be no surf. My plan was to wake up early to shoot this reflection of the sunrise.
Tide
Another factor that must be considered when taking photographs at the beach is the tide. I now use a tide chart app on my phone to determine where I am going that afternoon. The tide charts are great for a couple of reasons. Over the years I have learned which beaches look best on low tide and which beaches are inaccessible at high tide. The second point is the one that matters most. Years ago, there was a number of times where I went to the inaccessible beaches not realizing the tide was coming in as I was shooting. Did I have to walk back in waste deep water with my camera over my head? Maybe once or twice…
An extreme low tide led me to this small cove that is normally inaccessible and completely submerged.
Sun Azimuth
The final environmental factor that should be addressed is the location of the setting sun. Depending on the orientation of your location, the sun may set directly off the beach or at a sharp angle. This angle also changes throughout the year. There are some local spots that I won’t visit for nine months out the year specifically because of the angle of the sun. Once again, there are a number of apps that have detailed information on this subject.
I rarely incorporate the sun in my photography, but I knew the sun was going to set right along the coastline.
A Plan Comes Together
It may sound complicated, but spending twenty minutes planning saves hours of time spent shooting. Let me go over two situations where planning can help you be successful and save time.
The first situation is when you visit a beach, or any location for that matter, that you have never visited. I always look at the map on my app that tells me when and where the sun will set. This gives me my window of time, which is specific, and my location, which can vary a bit. I check the tides to narrow down my location and I’m ready to go. Because I’ve never been there, I give myself 30 minutes or so before my shooting window to find my subject. This may not sound like much time, but with the changing tide, it is all you really have before subjects are underwater or too dry. I already know the angle I’m going to face, and the time I’m going to start. Time is saved, and the chance of a successful outcome is greatly increased.
The second situation is when you go to a location you know well. I am very familiar with the beaches of Orange County and know which tides reveal each rock formation. My usual planning goes a little something like this. First, I check the tides and the location of sunset and decide the beach. Second, I check the surf report and decide my subject matter. Third, I check the time of the sunset and decide what time I’m leaving the house. It’s really not all that complicated when you break it down like this.
My planning led me to Crystal Cove State Beach for a reflection shot the moment the sun set. Five minutes on the beach and we were done.
Planning is essential to successful long exposure photography. There are a number of variables that need to be considered, and I haven’t even begun to get into exposure and focal-bracketing. In my next article I will focus on the post-production and the steps I take generate a final product. Hopefully this article will serve as a building block for you to give long exposure photography a shot. In the meantime, if you have any questions at all, please feel free to ask.